

A product bundle lets you sell several related products together for one price without removing their individual checkout options. In DeliveryKit, the bundle is its own Stripe product. The products inside it keep their own files, descriptions, and prices.
We’ll bundle Northstar Studio’s Brand Foundations and Social Story Templates products. A buyer pays for one Northstar Studio Bundle, then receives the downloads grouped under those two product names.
Step 1: Prepare the products you want to include
Set up every product in the bundle before you create the bundle itself. In Products, open each product and confirm that:
- it belongs to the same connected Stripe account and mode—Sandbox or Live—as the future bundle;
- it has an active one-time price;
- Files delivered contains at least one available file or resource link; and
- it is a direct product, not another bundle.
Each included product stays independently sellable. Editing the files on Brand Foundations later changes what both its direct buyers and Northstar Studio Bundle buyers can download. You do not need to copy those files onto the bundle.
Choose products that make sense together and decide their order. DeliveryKit uses that order in the delivery email and buyer portal. If the same file belongs to more than one included product, buyers see it once under the first product that contains it.
Step 2: Create the bundle product and choose its products
The bundle needs its own product and one-time price because buyers purchase it as one Stripe Checkout line item. From Products, choose Create product. Select the same Stripe account and mode as the products you prepared, then add the bundle’s name, description, image, and price. Leave its direct files empty and create the product.
On the new product’s detail page, find Files delivered and choose Choose files or Change delivery. Select Bundle, then choose at least two products. The selected order becomes the order buyers see. Choose Save delivery when the list is correct.
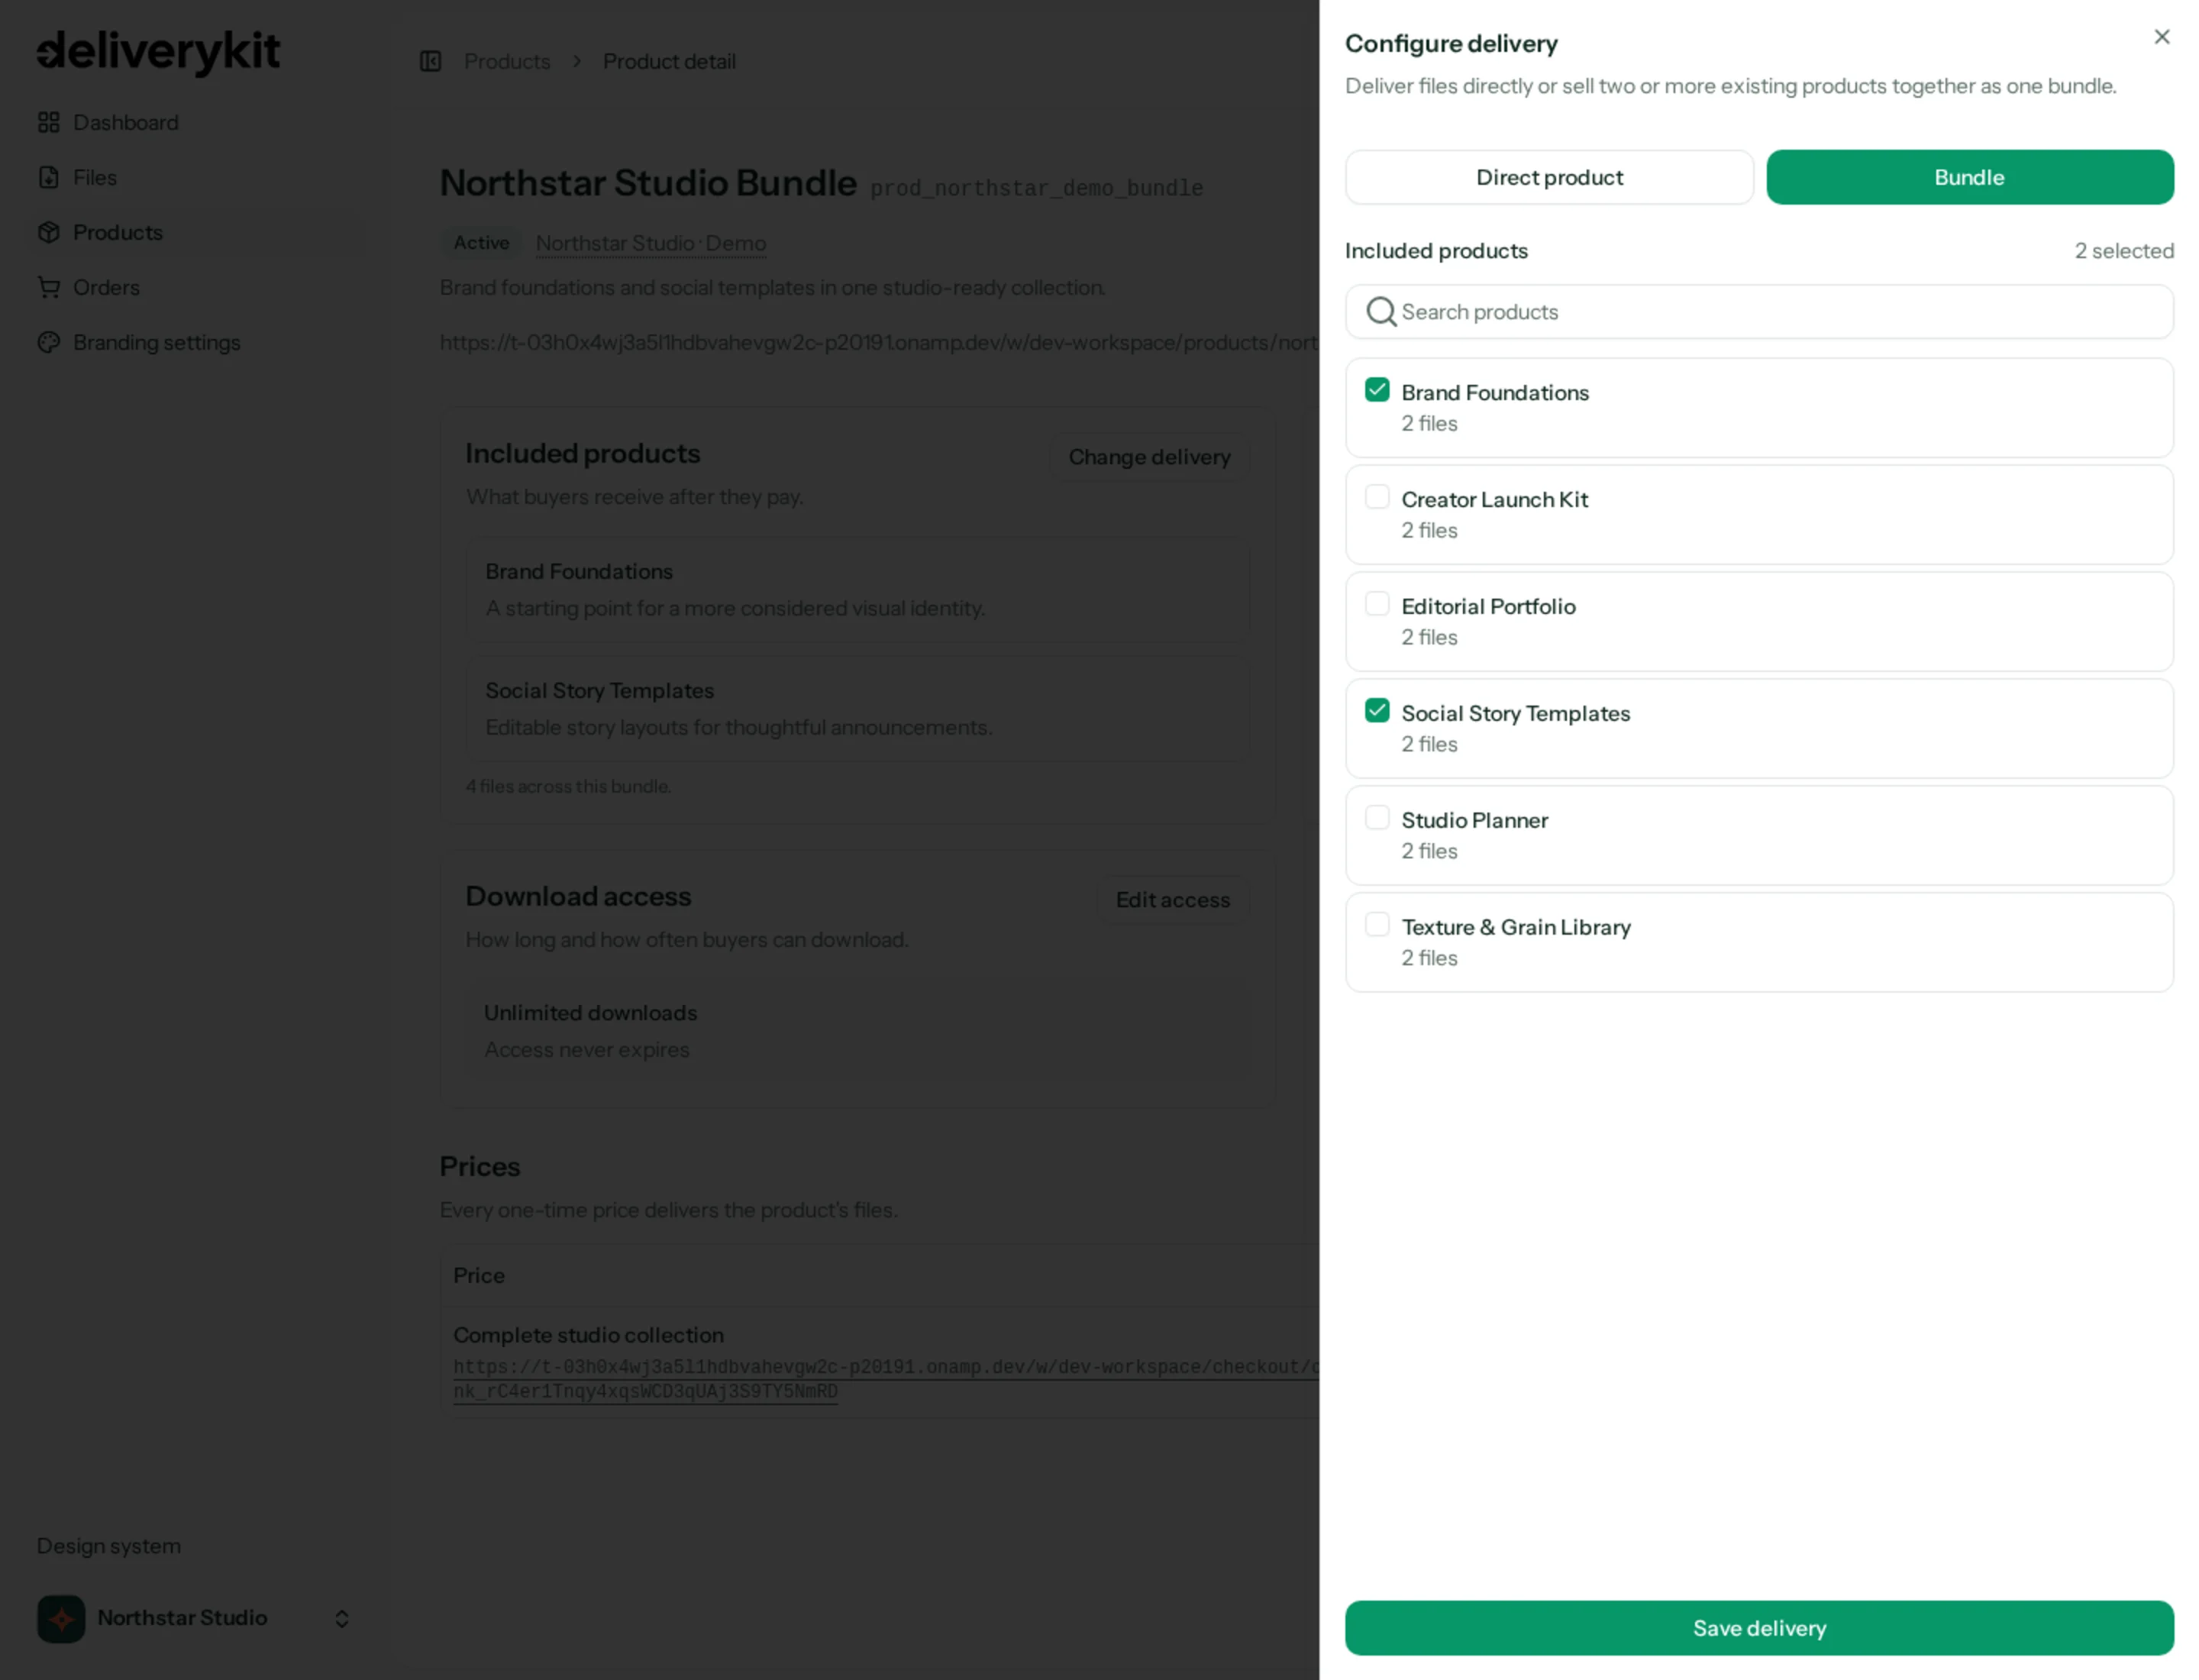
DeliveryKit prevents a bundle from including itself, the same product twice, a product from another Stripe environment, or another bundle. A product already included in a bundle also cannot be converted into a bundle, which keeps the composition direct and predictable.
Step 3: Review the bundle page and checkout
Use the product detail page to confirm the included products, delivery email, and one-time price. The bundle becomes checkout-ready only while it contains at least two active, direct products and every included product has something downloadable.
Choose Customize page to explain why the products belong together. The hosted page automatically names the included products, while your headline and description can explain the outcome and value of buying the collection. Save the page, then create or copy the bundle’s payment link.
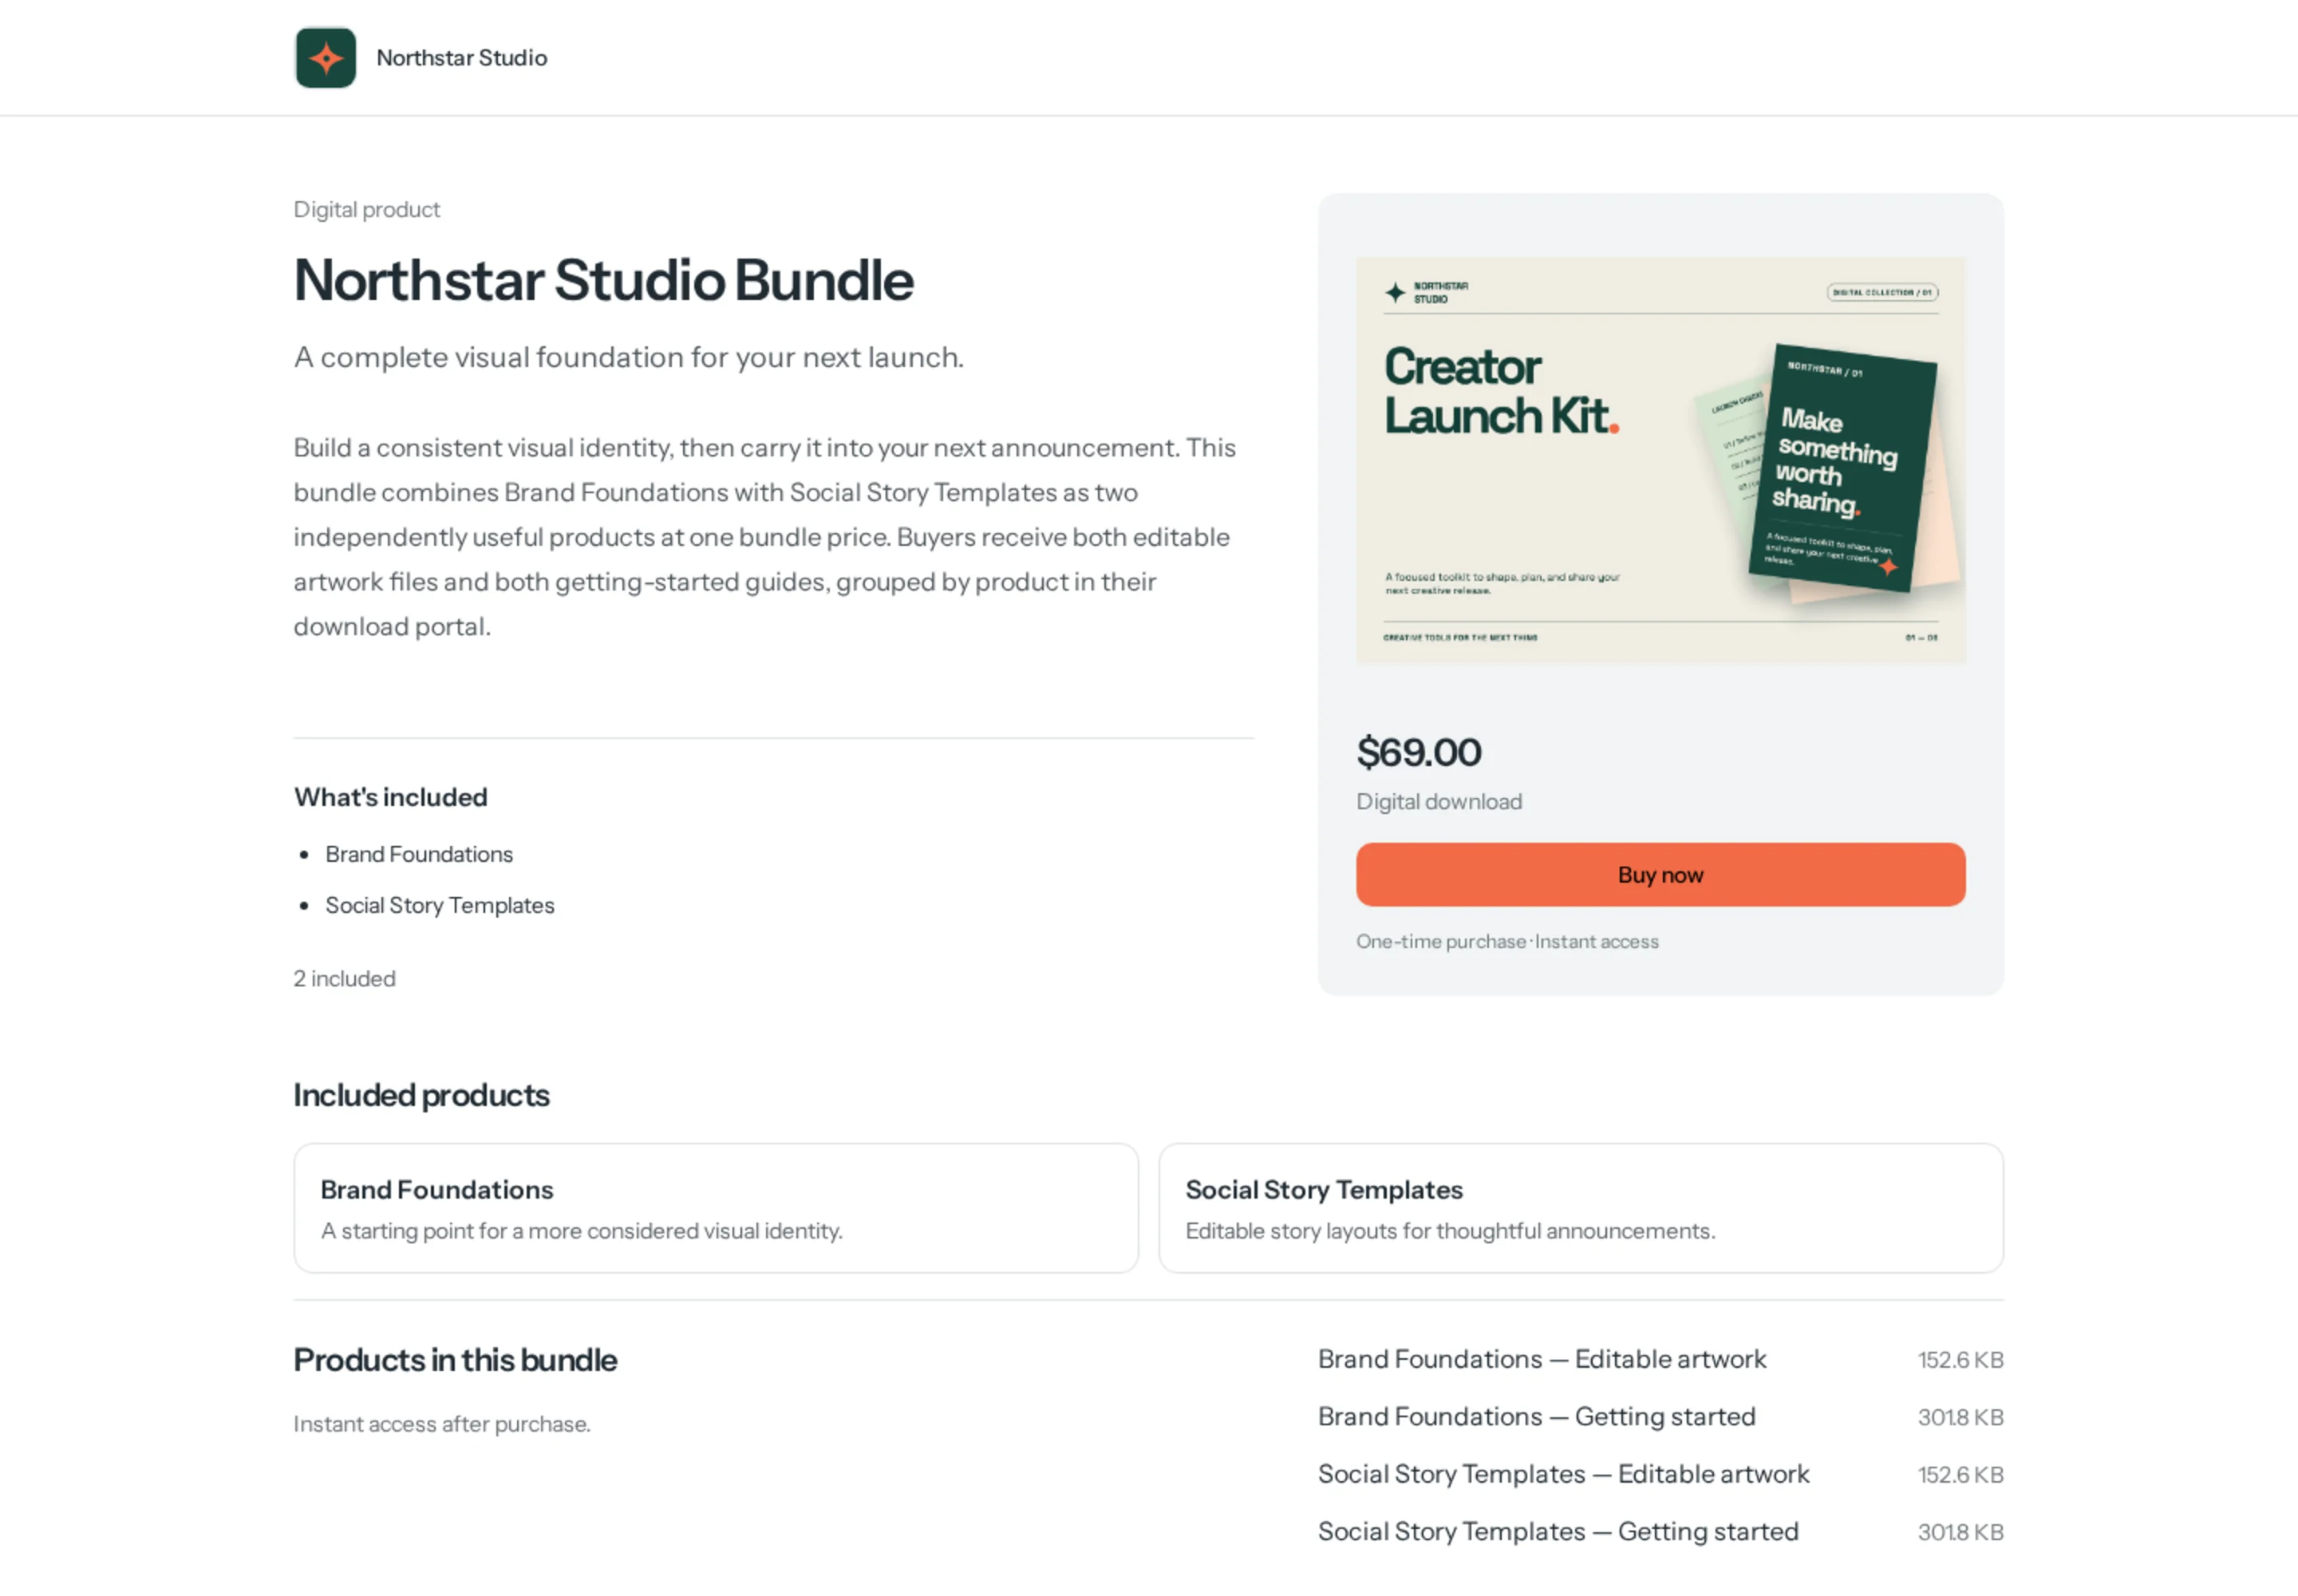
Use the Sandbox payment link and a Stripe test card before sharing a Live link. Confirm that Stripe Checkout shows one line item for the bundle—not separate charges for its component products.
Step 4: Check the grouped buyer delivery
After payment, DeliveryKit creates one order and sends one delivery email for the bundle. The email and buyer portal group downloads under each included product instead of presenting one unexplained file list.
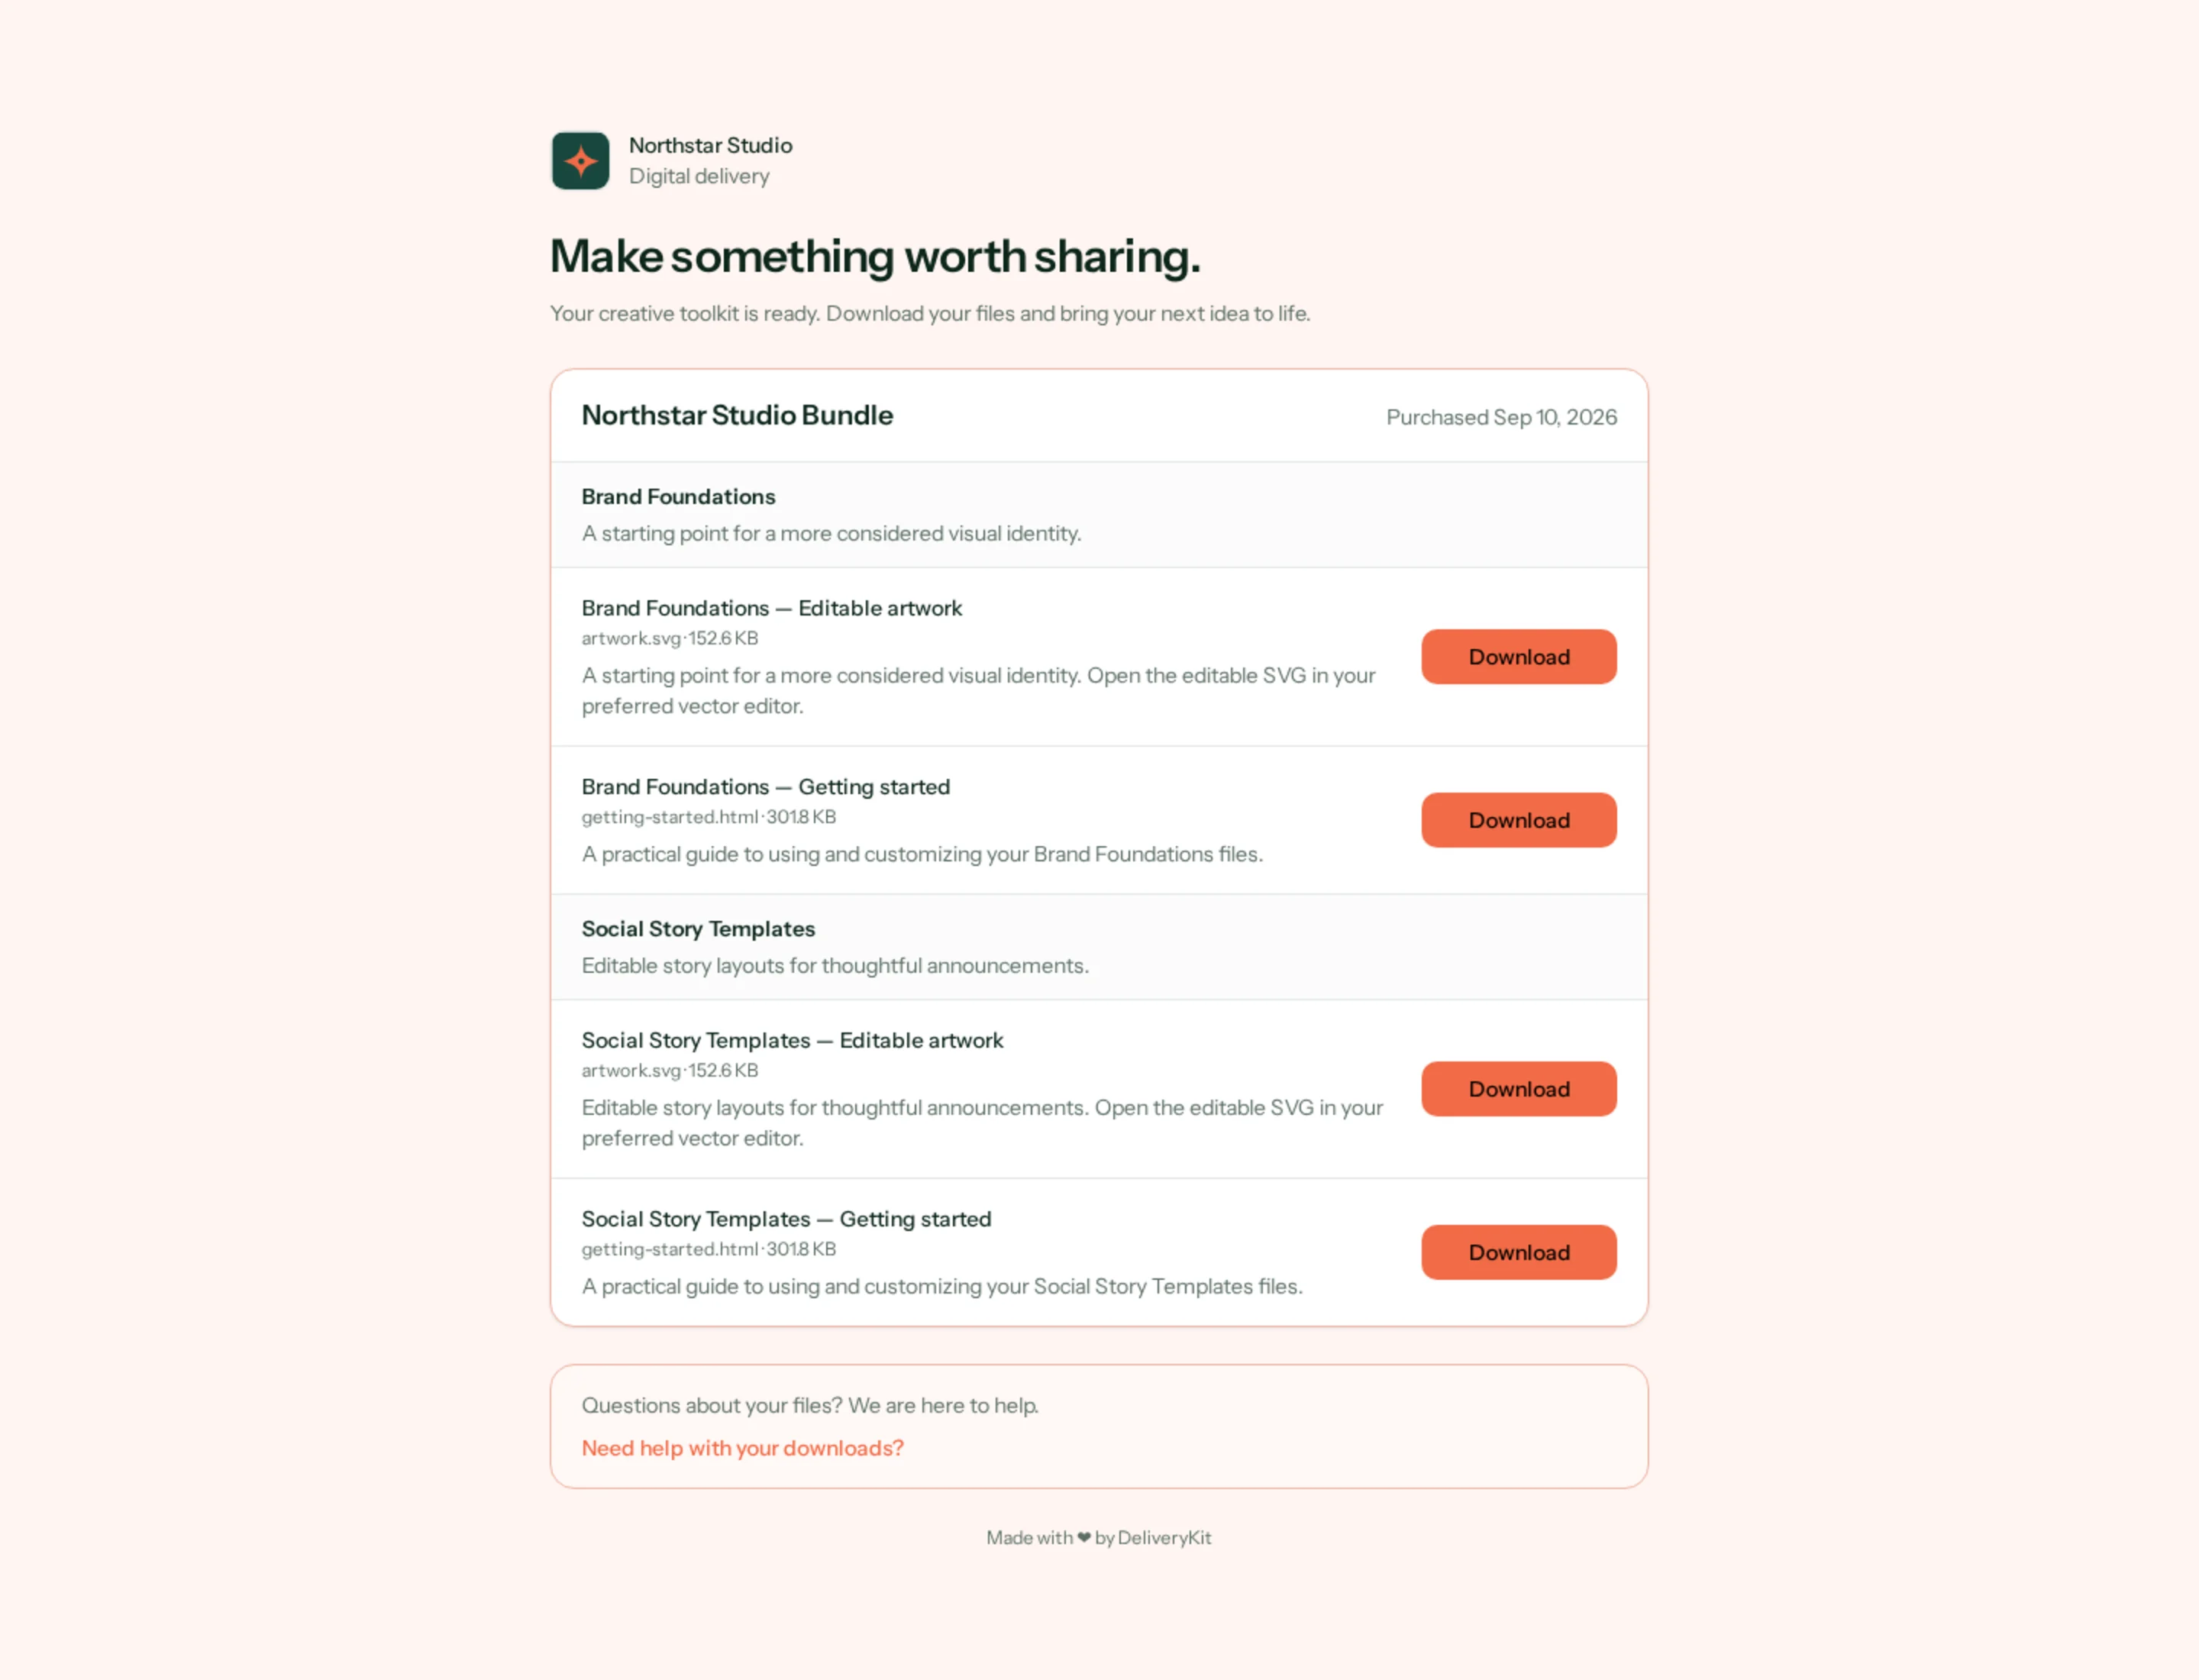
Open every download from the test order. If you use download limits or an access-expiration period, those controls apply to the bundle order just as they do to a direct product order.
Keep the bundle current
Bundle delivery stays live. Add, replace, archive, or remove a file on an included product and the bundle’s current buyers receive the same change. If an included product becomes inactive or loses all downloadable files, the bundle stops being eligible for checkout until its composition is valid again.
This means the included products remain the source of truth: maintain each product once, and DeliveryKit uses its current files for both direct sales and every bundle that includes it.